Notiz
Klicken Sie hier , um den vollständigen Beispielcode herunterzuladen
Colormap-Normalisierungen #
Demonstration der Verwendung von Norm zur Abbildung von Farbtabellen auf Daten auf nichtlineare Weise.
import numpy as np
import matplotlib.pyplot as plt
import matplotlib.colors as colors
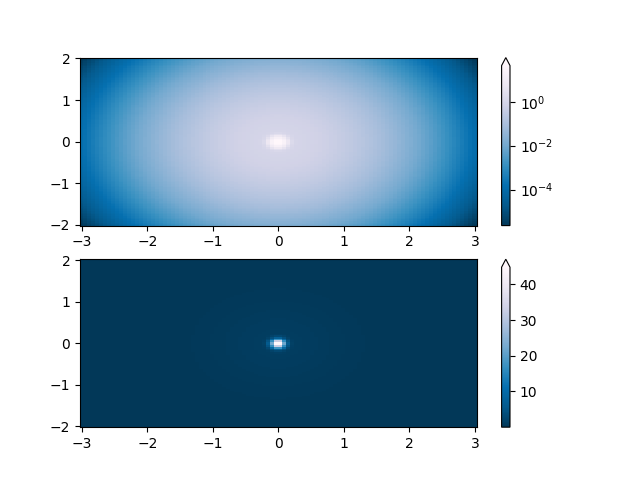
Lognorm: Anstelle von pcolor log10(Z1) können Sie Farbbalken haben, die die exponentiellen Beschriftungen mit einer Norm haben.
N = 100
X, Y = np.mgrid[-3:3:complex(0, N), -2:2:complex(0, N)]

# A low hump with a spike coming out of the top.  Needs to have
# z/colour axis on a log scale so we see both hump and spike.  linear
# scale only shows the spike.

Z1 = np.exp(-X**2 - Y**2)
Z2 = np.exp(-(X * 10)**2 - (Y * 10)**2)
Z = Z1 + 50 * Z2

fig, ax = plt.subplots(2, 1)

pcm = ax[0].pcolor(X, Y, Z,
                   norm=colors.LogNorm(vmin=Z.min(), vmax=Z.max()),
                   cmap='PuBu_r', shading='nearest')
fig.colorbar(pcm, ax=ax[0], extend='max')

pcm = ax[1].pcolor(X, Y, Z, cmap='PuBu_r', shading='nearest')
fig.colorbar(pcm, ax=ax[1], extend='max')
<matplotlib.colorbar.Colorbar object at 0x7f2cfb030d90>
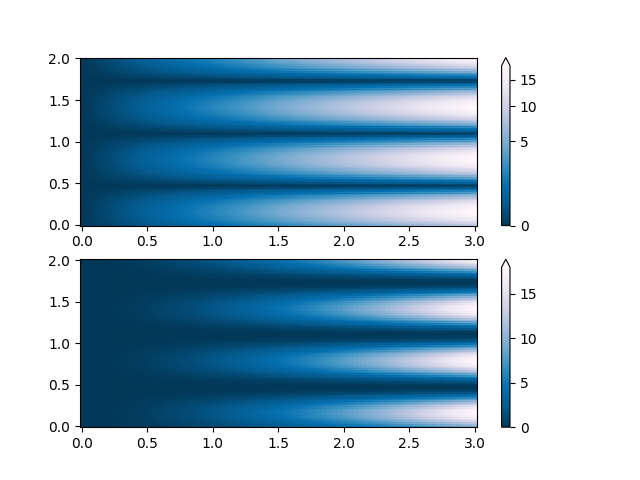
PowerNorm: Hier verdeckt ein Potenzgesetz-Trend in X teilweise eine gleichgerichtete Sinuswelle in Y. Wir können das Potenzgesetz mit einer PowerNorm entfernen.
X, Y = np.mgrid[0:3:complex(0, N), 0:2:complex(0, N)]
Z1 = (1 + np.sin(Y * 10.)) * X**2

fig, ax = plt.subplots(2, 1)

pcm = ax[0].pcolormesh(X, Y, Z1, norm=colors.PowerNorm(gamma=1. / 2.),
                       cmap='PuBu_r', shading='nearest')
fig.colorbar(pcm, ax=ax[0], extend='max')

pcm = ax[1].pcolormesh(X, Y, Z1, cmap='PuBu_r', shading='nearest')
fig.colorbar(pcm, ax=ax[1], extend='max')
<matplotlib.colorbar.Colorbar object at 0x7f2cfb4f44c0>
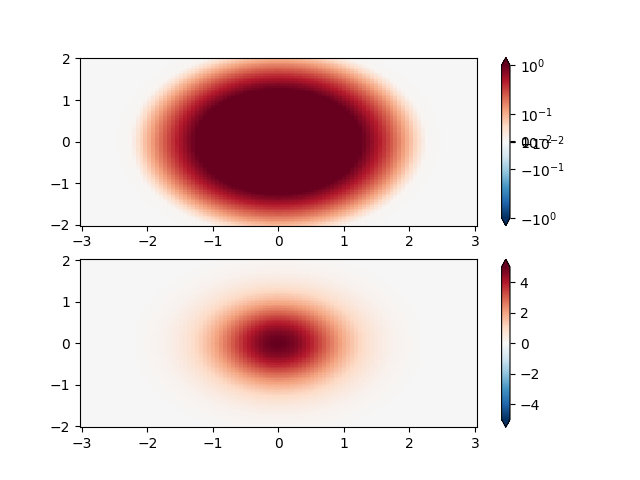
SymLogNorm: zwei Buckel, einer negativ und einer positiv, der positive mit 5-facher Amplitude. Linear können Sie keine Details im negativen Buckel sehen. Hier skalieren wir die positiven und negativen Daten getrennt logarithmisch.
Beachten Sie, dass Farbbalkenetiketten nicht sehr gut aussehen.
X, Y = np.mgrid[-3:3:complex(0, N), -2:2:complex(0, N)]
Z1 = 5 * np.exp(-X**2 - Y**2)
Z2 = np.exp(-(X - 1)**2 - (Y - 1)**2)
Z = (Z1 - Z2) * 2

fig, ax = plt.subplots(2, 1)

pcm = ax[0].pcolormesh(X, Y, Z1,
                       norm=colors.SymLogNorm(linthresh=0.03, linscale=0.03,
                                              vmin=-1.0, vmax=1.0, base=10),
                       cmap='RdBu_r', shading='nearest')
fig.colorbar(pcm, ax=ax[0], extend='both')

pcm = ax[1].pcolormesh(X, Y, Z1, cmap='RdBu_r', vmin=-np.max(Z1),
                       shading='nearest')
fig.colorbar(pcm, ax=ax[1], extend='both')
<matplotlib.colorbar.Colorbar object at 0x7f2cfb59c9a0>
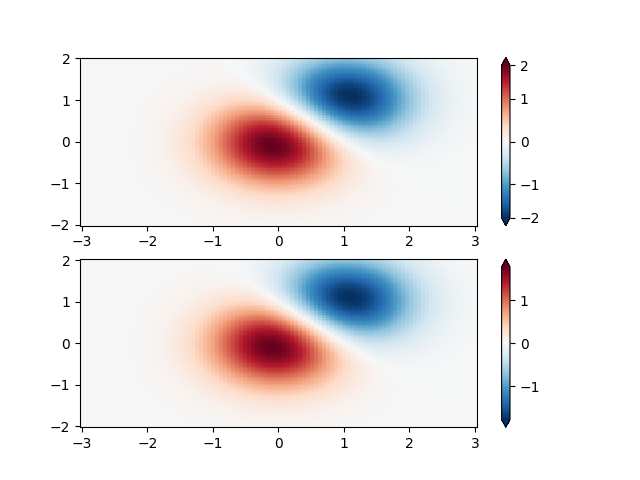
Benutzerdefinierte Norm: Ein Beispiel mit einer benutzerdefinierten Normalisierung. Dieser verwendet das obige Beispiel und normalisiert die negativen Daten anders als die positiven.
X, Y = np.mgrid[-3:3:complex(0, N), -2:2:complex(0, N)]
Z1 = np.exp(-X**2 - Y**2)
Z2 = np.exp(-(X - 1)**2 - (Y - 1)**2)
Z = (Z1 - Z2) * 2

# Example of making your own norm.  Also see matplotlib.colors.
# From Joe Kington: This one gives two different linear ramps:


class MidpointNormalize(colors.Normalize):
    def __init__(self, vmin=None, vmax=None, midpoint=None, clip=False):
        self.midpoint = midpoint
        super().__init__(vmin, vmax, clip)

    def __call__(self, value, clip=None):
        # I'm ignoring masked values and all kinds of edge cases to make a
        # simple example...
        x, y = [self.vmin, self.midpoint, self.vmax], [0, 0.5, 1]
        return np.ma.masked_array(np.interp(value, x, y))


#####
fig, ax = plt.subplots(2, 1)

pcm = ax[0].pcolormesh(X, Y, Z,
                       norm=MidpointNormalize(midpoint=0.),
                       cmap='RdBu_r', shading='nearest')
fig.colorbar(pcm, ax=ax[0], extend='both')

pcm = ax[1].pcolormesh(X, Y, Z, cmap='RdBu_r', vmin=-np.max(Z),
                       shading='nearest')
fig.colorbar(pcm, ax=ax[1], extend='both')
<matplotlib.colorbar.Colorbar object at 0x7f2cfb533910>
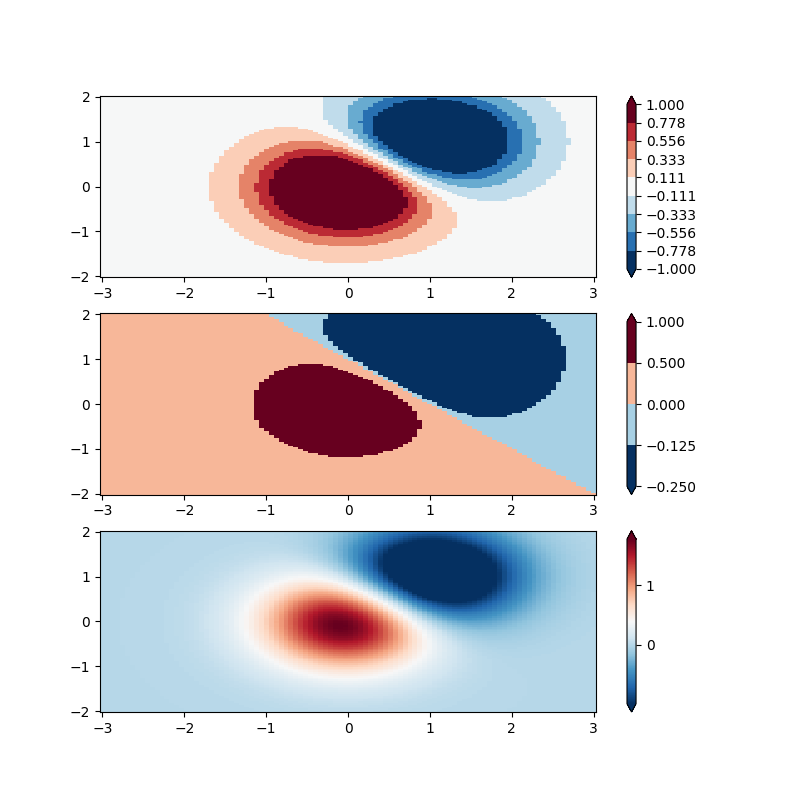
BoundaryNorm: Hier geben Sie die Grenzen für Ihre Farben an, und die Norm setzt die erste Farbe zwischen das erste Paar, die zweite Farbe zwischen das zweite Paar usw.
fig, ax = plt.subplots(3, 1, figsize=(8, 8))
ax = ax.flatten()
# even bounds gives a contour-like effect
bounds = np.linspace(-1, 1, 10)
norm = colors.BoundaryNorm(boundaries=bounds, ncolors=256)
pcm = ax[0].pcolormesh(X, Y, Z,
                       norm=norm,
                       cmap='RdBu_r', shading='nearest')
fig.colorbar(pcm, ax=ax[0], extend='both', orientation='vertical')

# uneven bounds changes the colormapping:
bounds = np.array([-0.25, -0.125, 0, 0.5, 1])
norm = colors.BoundaryNorm(boundaries=bounds, ncolors=256)
pcm = ax[1].pcolormesh(X, Y, Z, norm=norm, cmap='RdBu_r', shading='nearest')
fig.colorbar(pcm, ax=ax[1], extend='both', orientation='vertical')

pcm = ax[2].pcolormesh(X, Y, Z, cmap='RdBu_r', vmin=-np.max(Z1),
                       shading='nearest')
fig.colorbar(pcm, ax=ax[2], extend='both', orientation='vertical')

plt.show()
Gesamtlaufzeit des Skripts: (0 Minuten 3,715 Sekunden)